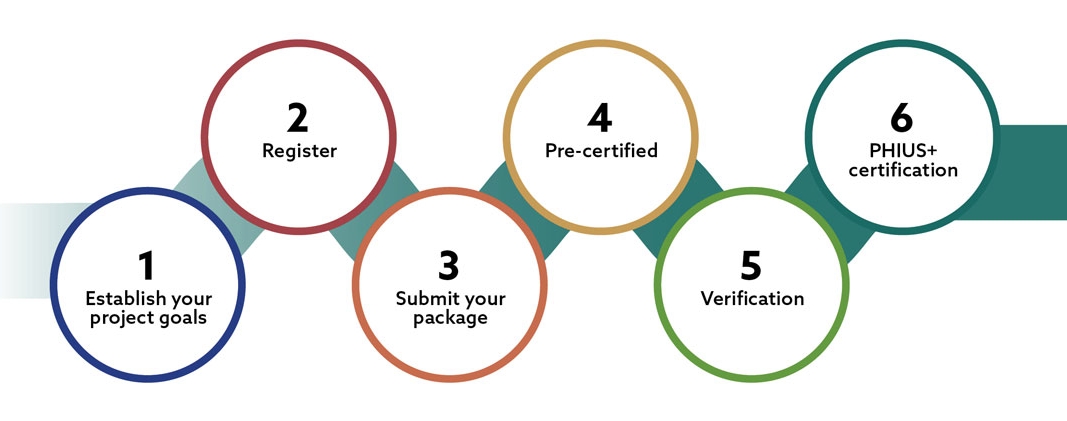
Six Steps to PHIUS+ Certification
If you do the upfront work, you'll have smooth sailing downstream
The Department of Energy is now promoting PHIUS+ certification as the highest attainable level of energy efficiency as part of its program suites. PHIUS+ certification has risen exponentially over the past five years, with the affordable multifamily passive-building sector in particular multiplying. As of 2017, PHIUS has certified and precertified more than a million square feet of North American projects.
The PHIUS+ Passive Building Standards represent a sweet spot where aggressive carbon and energy reduction overlaps with cost-effectiveness. It’s all about the bottom line.
Step 1: Set the goal, and build your team
If you’re not sure right out of the gate that you want to pursue PHIUS+ certification, a feasibility study can show you how close your current design is and what it will take to get to PHIUS+. After deciding on the goal, set up your team.
You'll need a CPHC professional and a Verifier, both certified by PHIUS. It is wise to hire a PHIUS trained builder, too, but some untrained builders can do it. It’s important to get the PHIUS certification staff involved as early as possible. They have seen many of these projects unfold; they know what can go wrong in the field. They can help you sidestep landmines that others may not notice.
Request a PHIUS+ certification fee and project contracts. Depending on the project size, you either need to get a custom fee, or you can use one of the base fees listed on phius.org. Also, each project needs a project contract with the project name and owner.
Step 2: Register for certification and create the project in our database
The contract and payment are submitted by the consultant or the project owner. After registration, we send the CPHC professional a login to our database so they can create the project and begin uploading information and documents. Upon precertification, the project will be visible in our project database, so upload a lot of great photos and as many details, notes, comments, and lessons learned as you can.
After the project is created in the database, we create a project Dropbox folder for your team to submit documents. This folder is used throughout the certification process: design review, precertification, and on-site quality-assurance/quality-control checklists and documentation.
Step 3: Prepare your package
After registering for PHIUS+ certification, prepare your PHIUS+ submission package. Submit a set of plans (including elevations, sections, and details) along with a preliminary energy model (built by your CPHC). Before building the model, though, study up on the prescriptive requirements. The design team should pay particular attention to the moisture design guidelines for building assemblies in your particular climate zone. Look through the quality assurance/quality control checklist, too.
Although these checklist items are for the rater or verifier at the end of the project, the design team should be aware of them at the beginning. The PHIUS+ certification packet lists all the documentation you need to submit.
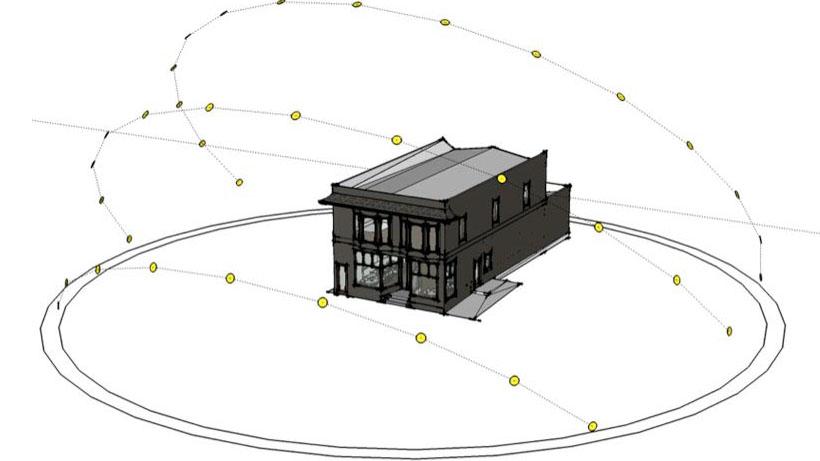
Sun and shading affect how a building performs. A shading study is one piece of the package analyzed by PHIUS for precertification. Image courtesy of Hammer and Hand.
During the design phase, the CHPC will create the initial energy model using the modeling protocol in the PHIUS+ certification guide. The guide follows the order of the energy modeling software, so, while it is technical, it is also intuitive. This first energy model is like an advanced feasibility study. The team learns where the building stands as designed, and what you need to do to get it to PHIUS+. With the first energy model in hand, the design team collaborates to improve the design until it meets the standard.
Step 4: Earn precertification
With plans and a model ready, the CPHC professional will prepare all other documentation for the first round submission. There are almost always three rounds of design review, with the first round taking the longest.
Round one: 4 to 8 weeks
The more documentation we get, the more we can comment on, and the more accurate your round two design will be. We will scrutinize every input of the energy model, review all the submitted drawings and specifications, and comment. We’ll address areas of concern in the design and thermal-bridging analysis that may be required, and we’ll ask for supporting documentation if it’s missing. We recommend hiring a verifier early in design phase.
Round two: 2 to 4 weeks
You may want to sit down before you open the first review—especially if you didn't go over the prescriptive requirements. In the first design review, you will learn what’s missing and what concerns us, for example, about moisture, comfort, or other problems.
This is why we recommend that the design team look at the certification guide in detail—or email us with questions as you're modeling—so that you're not surprised by our first round of feedback. Teams that work closely with us during round-one reviews typically get feedback covering smaller-scale items; if the design team does not go through the guide, large-scale issues could push the design out of certification range.
The CPHC professional works with the design team to incorporate this first round of feedback and then submits a second-round package for review— ideally with all the supporting documentation asked for in round one.
Round 3: 2 weeks or less
The CPHC professional receives our round-two feedback and adjusts the design and the energy model if needed, and submits a package for round-three feedback, the last submission. Our round-three feedback will have minimal comments.
With everything marked up on the feedback form, the project is approved to move forward, and PHIUS will award the project as PHIUS+ Precertified. Now, we send a precertification letter to the team, and the project becomes publicly visible on phius.org; this is the official hand-off to the building team.
Step 5: Build and verify: the QA/QC process
At this point, construction documents can be completed, and the baton is passed from the design team to the construction team. As the project breaks ground, you can be confident that you are on the path to meeting the PHIUS+ certification standard.
Step 6: PHIUS+ certification
At this this point, construction documents can be completed and the project is free to break ground confident that you're on the path to meeting the PHIUS+ certification standard.